Stitches are the glue that hold garments together. But there are different kinds of stitches that work better depending on the type of fabric and the end use case. A stretch jersey might require a different stitch if it’s used for a loose dress versus active leggings.
In this guide on kinds of stitches and callouts for garment construction, you’ll learn how to:
- Select the right stitches for your designs
- Create effective stitch callouts for tech packs and spec sheets
- Know when to use what stitch types (and what to do if you don’t know what one’s called)
You’ll also gain a deep understanding of how stitches impact the aesthetics, functionality, and durability of your garments. This guide will help you make informed decisions throughout the design and production process.
6 Main Categories of Garment Stitch Classes
All stitches fit into one of these 6 categories. You don’t always have to know which stitch belongs to which class (I don’t!), but it’s good to know that at a higher level, there are the 6 classes:
- Class 100: Single-Thread Chain Stitch
- Class 200: Hand Stitch
- Class 300: Lockstitch
- Class 400: Multi-Thread Chain Stitch
- Class 500: Over Edge Chain Stitch
- Class 600: Covering Chain Stitch
Now let’s look at 9 of the most commonly used stitches and stitch names within these categories, focusing on their applications in garment construction.
9 Essential Types Of Garment Stitches And When to Use Them (with photos)
Not to overwhelm you, but there are hundreds of stitches and stitch variations recognized in the fashion industry! You don’t need to know them all, and you’ll learn more with time. You can even just ask your manufacturer, “what kind of stitch do you suggest here,” or send them a photo and say, “use this stitch.”
These are the 9 most common types of garment stitches that are essential for anyone in the fashion industry, with pictures and common uses for each one so you can easily identify them.
Lockstitch
The lockstitch is one of the most basic stitches and widely used stitch in sewing machines. It creates a strong and secure seam. It involves interlocking the upper thread and the lower thread within the fabric layers, ensuring stability and longevity.
Common places lockstitch is used: seams on garments like dresses, shirts, and pants, creating topstitching details on pockets and collars, attaching buttons.

Zigzag Stitch
The zigzag is another basic stitch that moves back and forth in a zigzag pattern. It serves various purposes such as finishing raw edges, preventing fraying, and creating seams with stretchability.
Common places zigzag stitch is used: seam enclosures in unlined garments, attaching elastic for stretchable seams, decorative detailing

Chain Stitch
Although commonly seen in embroidery designs, the chain stitch can also be utilized to reinforce specific areas of a garment, enhancing its overall stability.
Common places chain stitch is used: topstitched reinforcement on neck bands of t-shirts, decorative topstitching on denim jackets and jeans, hems of skirts and dresses

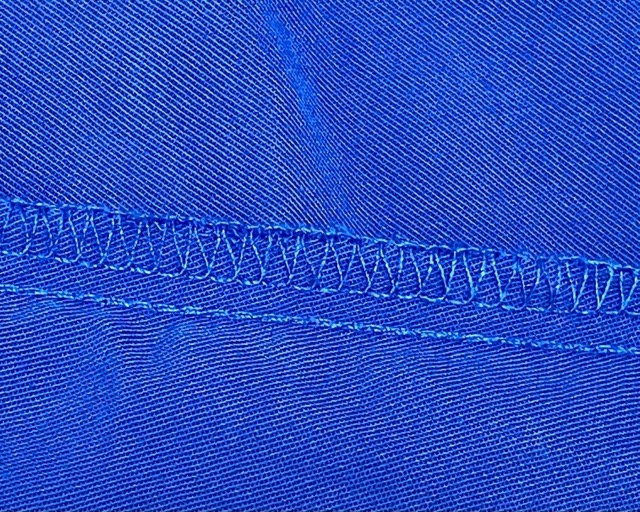
Overlock Stitch
A serger machine creates overlock stitches to finish raw fabric edges and prevent fraying. It creates a professional and clean edge to the garment.
Common places overlock stitch is used: finishing raw fabric edges on seams, sleeves, and hems of various types of garments
Cover Stitch
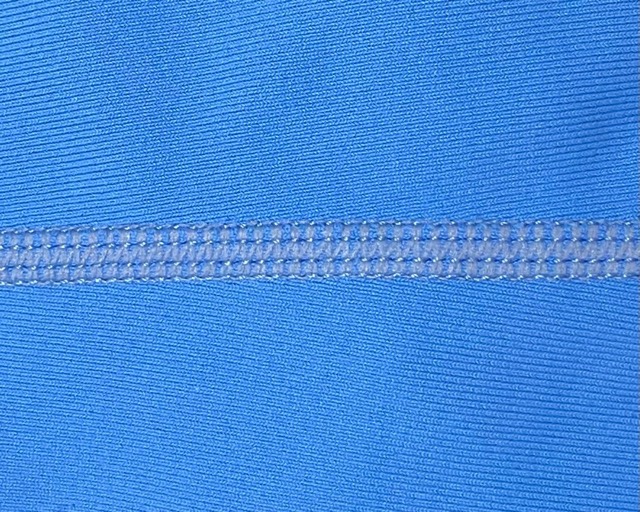
Achieving a neat and professional finish, the cover stitch is used for hemming and topstitching stretchy fabrics and can be executed with a double or triple needle.
Pro Tip: Here’s a tutorial on creating a cover stitch brush in Adobe Illustrator.
Common places cover stitch is used: hemming and topstitching activewear, such as leggings and sports bras
Basting Stitch
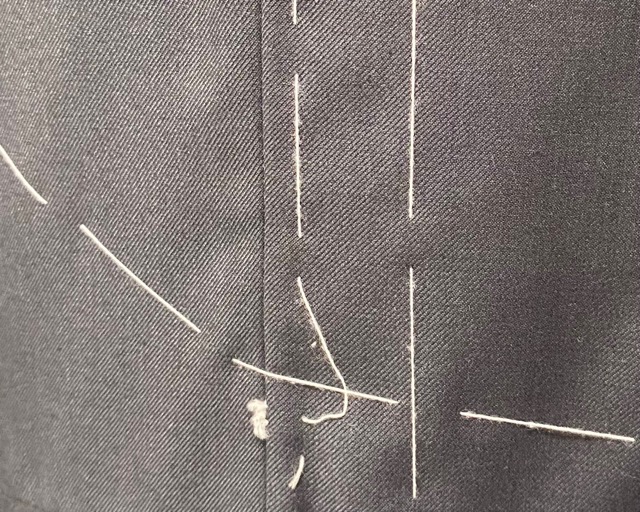
Used temporarily, basting is often done by hand stitching lose and long stitches that hold fabric layers together during fitting or before permanent stitching is done.
Common places basting stitch is used: preparing pleats and gathers for pants, securing linings and interlinings to skirts and dresses
Blind Hem Stitch
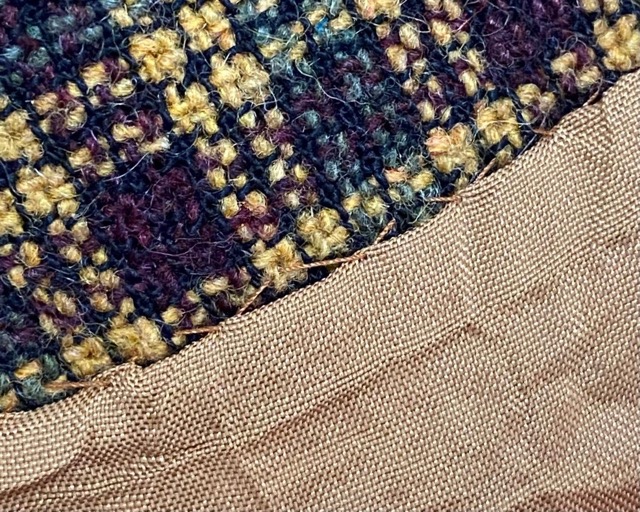
This nearly invisible stitch is ideal for creating hemlines that do not show on the right side of the fabric. It adds a sophisticated and clean touch to the garment.
Common places blind hem stitch is used: hemlines on garments such as trousers, skirts, and dresses
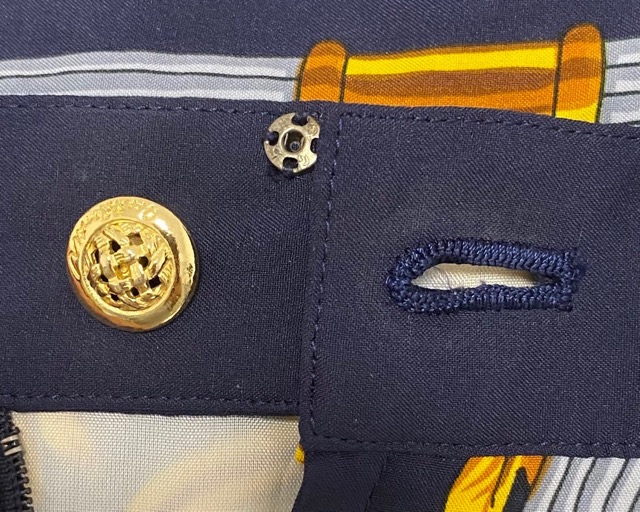
Buttonhole Stitch
As the name suggests, this stitch is primarily used to create secure spaces for buttons. It can vary in style and size and can be executed by both machine and hand.
Common places buttonhole stitch is used: shirt plackets, cuffs, waistbands, and other areas where buttons are attached
Bar Tack Stitch
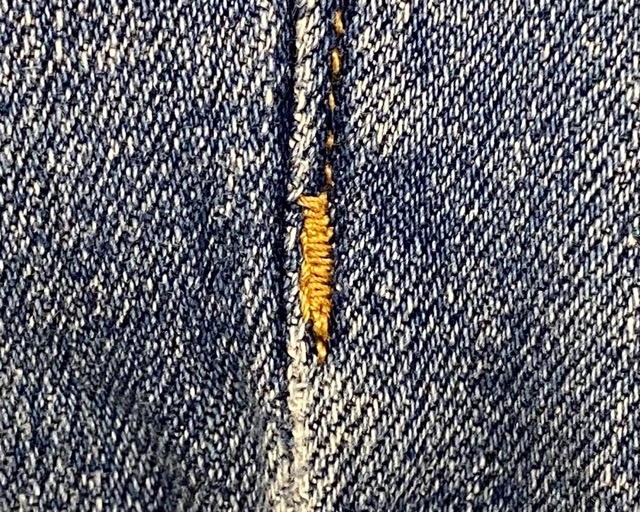
With the purpose of reinforcing areas that experience stress, the bar tack stitch adds strength and durability to the garment.
Common places bar tack stitch is used: pocket openings, belt loops, buttonholes, fly closure
How To Select The Right Types of Stitches For Garments
Now that you know the most common types of stitches, how do you choose the right ones for your designs? Here are some factors to consider:
Material: Different fabrics behave differently during garment construction. Consider the fabric’s characteristics and choose the appropriate stitching method accordingly. For example, a stretchy knit fabric may require a zigzag stitch to maintain elasticity.
Type of Garment: Consider the purpose and style of the garment, as well as your design requirements. Activewear, for instance, may require stronger and more elastic stitches.
Part of the Garment: Different parts of a garment and different seam types may require specific stitches. For example, using a blind hem stitch for invisible hemlines or a reinforced bar tack stitch for pocket openings.
Budget and Time Constraints: High-end clothing with elevated design requirements might require more complex and secure stitching methods, while quick-turnaround projects might call for efficient stitching techniques.
Whenever I go shopping, I can’t help but check the inside of a garment and the different seam types to geek out over the stitching and construction details! (Really, looking at garments – or even taking old ones apart – is a great way to learn about kinds of stitches and callouts for garment construction!)
In addition to understanding different types of stitches, knowing when and how to use them will improve your garment construction skills. It’ll also help you understand how various construction details are designed and made.

How To Callout Stitches In Tech Packs And Spec Sheets
When working on a garment, you need to add accurate stitch callouts to tech packs and spec sheets. It’s not just about labeling the type of stitch to use, but also providing clear instructions that anyone involved in garment construction can easily understand.
Here’s how to create and add effective stitch callouts:
1. Specify the type of stitch to use and its location on the garment
To create an effective stitch callout, start by clearly stating which type of stitch should be used where. Be specific because different parts of a garment may require different stitching techniques
For example: “Use a straight stitch along the side seams” or “Apply a zigzag stitch at hem.”
2. Include details such as stitch length, thread color, or needle type
Think about details that might affect how the stitching is done, and make sure to include those.
For example:
- SPI (number of Stitches per Inch, calculated by stitch length)
- needle specs (will it use single, double, or even, triple-needle?)
- thread color
- thread type
In your tech pack or spec sheet this might look like:
- “Topstitch the hem at 10 SPI using contrasting thread”
- “Use double needle topstitching at the collar edge”
- “This detail requires hand stitching as per the sample sent”
These extra notes can help ensure that everyone understands exactly what needs to happen during sewing.
Providing clear instructions for garment construction and stitching requirements will ensure designs are manufactured right.

What To Do When You Don’t Know The Type Of Stitch To Use For Garment Construction
Identifying stitches can be challenging, especially if you’re new to the fashion industry or working with unfamiliar techniques.
The secret trick when you don’t know the type of stitch? Look at similar garments in the market! (a good excuse to go window shopping! )
If you’re designing a denim jacket, for example, examine other denim jackets. Pay attention to their stitching details – how are they constructed? What types of stitches do they utilize? You can even use photos of these details as construction callouts in your tech packs.
To become proficient at identifying different types of stitches, practice makes perfect. Spend time examining different garments – both inside out and right side up – until you’re familiar with how each kind looks and feels.
You can also find inspiration from credible sources like books and online blogs where fashion designers share their work and techniques.
The book Garment Manufacturing Technology is a great resource that delves into the intricacies of garment production. It also dives deep into the classes of garment stitches and their practical applications.
If you’re looking for a more concise guide, this blog post on Apparel Merchandising Learner offers a quick and visually illustrated cheat sheet, perfect for understanding the various types of garment stitches.
Also, you can always ask your factory what a stitch is called! They are a wealth of knowledge and can help educate you on stitch types best practices for garment construction, and are happy to share insights.
Another approach is to include a photo of the stitch in your tech pack as the construction callouts. Just make an arrow to the callout and say “make it like this” – as simple as that! This method allows manufacturers to see exactly what kind of stitch you want, even if neither party knows its official name.
If you’re using this approach, make sure to:
- Take clear photos: Ensure that your photos clearly show the details of the stitch. You might need to take close-ups or use different angles for the best results.
- Provide detailed descriptions: Alongside your photo, add callouts with as much information about the stitch as possible – where it’s located on the garment, its purpose (e.g., decorative or functional), any special characteristics (like stretchiness), etc.
- Avoid assumptions: Never assume that manufacturers will understand what you want based solely on a picture. Always accompany images with thorough explanations to avoid misunderstandings down the line.
- Send a cutting: The best thing to do is to send an actual cutting or swatch of the stitch type. If you don’t want to cut the garment up, send the entire garment. Never underestimate the power of a physical sample!
Alright! You now know the basic types of stitches for garment construction and how to spec them in tech packs.
By familiarizing yourself with common stitches, understanding their applications, and communicating stitching requirements, the production process will go much smoother.
(And remember, you don’t need to know every single type of stitch—use the workarounds I shared to make sure your designs are made right!)


