Fitting is fundamental in creating garments that not only look good on mannequins but also on people IRL.
So, in this article, I’ll walk you through everything you need to know about fitting garment samples. From a step-by-step guide to essential tips – I’ve got you covered! We’ll also explore how freelance fashion designers can conduct fitting sessions remotely.
The Garment Sample Review Process
There are five steps in the garment sample review process:
- Measure the garment sample
- Check the garment construction and stitching
- Assess the materials and finishing
- Check the fit and functionality
- Document your feedback
In this guide, I’ll focus specifically on Step 4, which is to check the fit and functionality through a fitting session. If you need a refresher on the entire process, I suggest you review my Step-by-Step Guide on How to Review a Garment Sample.
What Happens in a Garment Sample Fitting Session?
The purpose of a fitting session is to confirm if the garment sample matches what was specified in the tech pack and the design intention.
Technical designers usually take the lead here, and should have already done the following steps:
- Measure the garment samples
- Check the garment construction and stitching
- Assess the materials and finishing
While the technical designer takes the lead, a sample fitting session is usually done with the creative designers, product developers, and merchandisers so they can also provide feedback and keep tabs on the sample’s progress.
The garment samples are usually worn by a fit model (more on this later!) and are evaluated for fit, balance, proportions, functionality, and design. It’s a critical checkpoint to identify any issues that need adjustment before moving forward with bulk production.
Everything agreed upon by the team from these fitting sessions gets documented in the tech pack’s sample evaluation comments. These comments then circle back to the sample makers as a to-do list for revisions.
Fitting Initial Garment Samples vs Size Set Samples
There are differences between fitting an initial (second, third, etc.) sample/proto and a size set sample (also called the pre-production samples).
When you’re fitting an initial garment sample, you only have to focus on getting that one size perfect. But when it comes to your size set samples, you need to check how your garment holds up across different sizes.
For example, the sleeves might need to be longer on bigger sizes. And some sizes may need extra buttons for a better fit. Also, if there’s a print design on the clothes, it must look good on all sizes, not too small or too big.

It’s important that each size maintains the same look and feel, so you need to check if the garment is graded correctly and looks good across the full range of available sizes.
Pro Tip: There are different types of samples in the garment sample making process. You can learn about all of them in my guide on the 12 Types of Garment Samples During Apparel Production.
What is a Fitter or Fit Model?
Fitters try on the sample garments to assess how they fit, function, and feel. They help designers evaluate how a garment looks and feels on a real person before bulk production.
While larger fashion brands might have dedicated fit models to ensure consistency, a fitter can just be a colleague or one of your team members.
If you’re a remote freelance fashion designer, this can be one of your friends, family members – or when you’re out of options, yourself or a dress form.
It’s important to select a fitter whose body proportions reflect your fashion brand’s target sizing and customer base. So, imagine, if your fashion brand specializes in petite clothing, your fitter should match the height and size that your brand caters to.
Fashion brands maintain a set of fitter specs or an internal size chart. This document outlines the ideal measurements for each size based on the brand’s standards. When technical designers are selecting fitters, they refer to this list to assess how closely a person’s measurements align with the brand’s ideal standards. It also helps identify areas where the fitter’s measurements may deviate from the ideal.
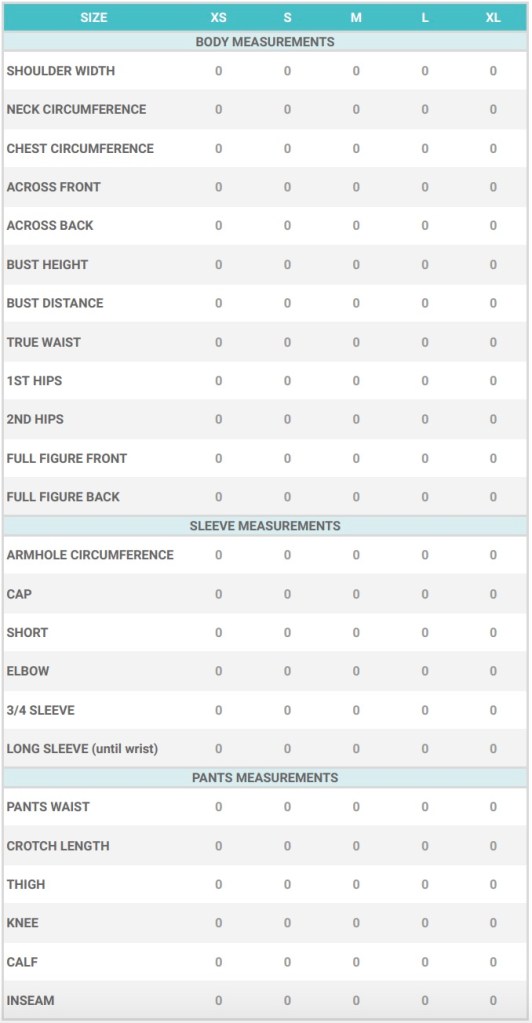
If you need some brushing up, I have guides on the size charts used in fashion (including free templates) and how to take body measurements.
Fitting on a Fit Model vs Dress Form
Fitting on a fit model or a dress form are your two main options when conducting a fit session. I always recommend fitting on an actual person (this can be a fit model, your friend, colleague etc.) because a dress form can never replicate a human body perfectly and doesn’t move.
However, there are both advantages and disadvantages to using either method. Let’s break them down.
Fitting on a fit model is my preferred approach because it offers a more realistic evaluation of a garment sample on a living, breathing body. This allows for better assessment of functionality and overall feel. Fit models can also provide feedback based on their experience wearing the garment.
But obviously, there is no single “perfect” body that will precisely match your fitter specifications. You always have to be mindful of the fitter’s measurements and body shape. For instance, if the shoulders feel tight, it might be because the fitter has broader shoulders. Adjusting the garment based solely on the fitter’s measurements could lead to unintended alterations that affect the overall fit.
Paid fit models are expected to maintain their size and build consistently, but this option can be costly and may not always be available, as they are usually hired on a project basis or by the hour.
On the other hand, using a dress form eliminates the challenges associated with finding the right fit model, as it’s always readily available. However, dress forms lack the ability to move, making it challenging to assess how the garment drapes, moves, and functions in real-life situations.
Pro Tip: While trying on your own proto samples might seem convenient, I do not recommend it. Fitting on yourself makes it difficult to make adjustments correctly, especially when you need to check the back, adjust lengths, shape, and make markings on the garment.
How to Fit a Garment Sample: Step-by-Step
Here’s a step-by-step guide to help you conduct your next fit session flawlessly.
- Set a meeting
- Select your fit models
- Prepare your samples and materials
- Conduct the garment sample fitting session
- Document comments and take photos
- Fine-tune the adjustments
- Update your tech pack

Step 1: Set a meeting
Initiate a meeting for the fitting session. Make sure to invite all relevant members like the creative designer, product manager, merchandiser, etc.
When sending the message, specify which style numbers will be evaluated in the session. This helps the other team members prepare and also flag any urgent styles that might need early evaluation.
For example, if your merchandiser only has a few minutes to spare, having them specify which proto samples are the most urgent for them can help the overall timing of the fitting session.
Step 2: Select your fit models
Select your fit models based on the necessary sizes. Occasionally, I would receive fit sample garments in various sizes, so having fit models who can represent each size range is necessary.
When fitting with colleagues, be clear about the timing and duration in advance to give them ample time to prepare. Remember – just like you, they also have other things to do (and fitting was most likely not in their job description!).
Pro Tip: I’ve had fit models cancel on me at the last minute. That’s where having a list of backup fitters is helpful, ensuring your fitting session stays on track. And when all else fails, the dress form is always there.
Step 3: Prepare your samples and materials
Expect to be on your toes the entire time during sample fitting sessions. You’ll be presenting and adjusting the samples in real-time, so make sure you have all your tools ready – like your samples, notes, measuring tape, marker, pins, camera etc.
Step 4: Conduct the garment sample fitting session
If this is a new sample, you can start by addressing any important or general issues on the prototype sample and how close or far off it is from the design.
If it’s a resample, you can discuss major changes you requested prior, which were (or were not) followed.
Then, you can move on to assessing the sample garment’s fit – checking for tightness, pulling, or any pattern distortions from all angles. Make sure to check key areas like shoulders, bust, waist, hips, and sleeves.
If anything doesn’t match the spec sheet or looks off from the desired fit, you’ll have to determine the necessary adjustments.
Pro Tip: It’s important to note that off measurements are different from pattern shape issues. For example, the crotch measurement can be correct, but if the curve is too shallow, it will still fit tightly. These types of issues will involve tweaking the pattern.
Next, check for functionality and comfort. Have your fitters move around, sit, or try out any special functions of the garment sample.
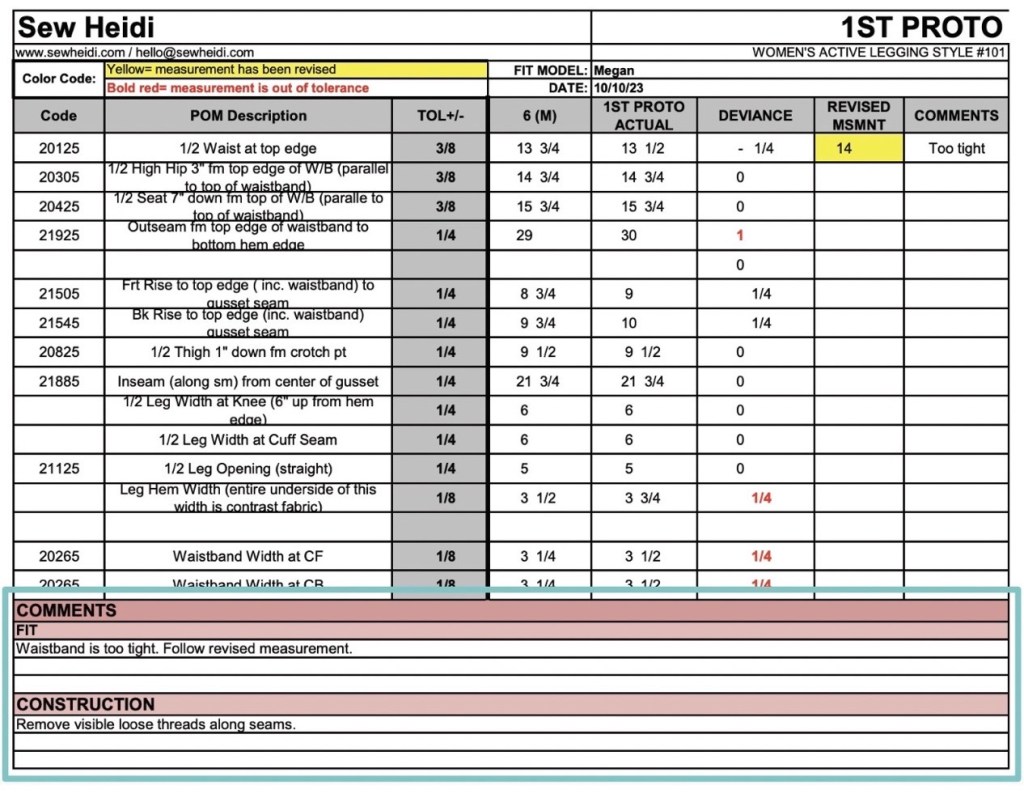
For example, if you’re evaluating activewear leggings, you can ask your fit model to do a quick squat to check the garment’s performance.
True Story: I had a nightmare situation with one of my clients who ordered bulk production of 2000 pairs of leggings that came in way too sheer in the booty. We had done bend over tests with the protos to make sure they weren’t see through, but something happened during production. Yikes!
This part can get messy if you’re not prepared or used to it yet, so here’s a quick checklist:
- Major fitting and design concerns: Assess overall garment look and fit.
- Fitting (Measurements): Check for off specs measurements, tightness, pulling, etc.
- Fitting (Pattern): Check for issues on pattern shape.
- Functionality and comfort: Have the fitter move around and test the functions of the garment.
Step 5: Document comments and take photos
Document all comments made during the fitting session, including any adjustments and requests needed for each part of the garment.
Record who participated in the fitting session, the fitter’s name, and the date of the session. These details will help you whenever you need to refer back to previous fitting sessions.
And don’t forget to snap some sample photos during the fitting sessions. Photograph the sample from various angles – front, back, sides, and any important details that require attention.
Step 6: Fine-tune the adjustments
After the fitting session is over, the technical designer reviews the changes discussed. This could involve reshaping darts, adjusting seams, or re-designing some areas.
Step 7: Update your tech pack
Once the fitting session wraps up, make sure to update your tech pack with all the changes discussed. This keeps your design journey on track, providing a clear reference for everyone involved.
True story: We once had a sweater sample revised repeatedly, but the final tech pack wasn’t updated. The clothing manufacturer still based the bulk production on the (un-updated) tech pack, and the fit was all wrong. Your tech pack has to be updated with every change and fit session!
How to Do A Garment Sample Fitting Remotely (as a freelancer)
Most people think this is impossible! In fact, I recently did a freelance training, and someone literally said, “How can I do a fitting remotely? That is the MILLION DOLLAR question!”
And if you had asked me when I was just starting out, I’d have sworn that it was impossible, too.
But as I built my career as a freelance fashion designer, I learned that you can do everything in fashion remotely.
There’s not much difference in how you would do it face to face. The biggest thing to consider is how you’ll handle the logistics like getting a sample to both you and your client. It’s as easy as having the factory make two and send one to each of you.
As for the fitting session, you can call a friend to help you out and be your fit model and conduct a live online fit sample session with your client. If it’s difficult to find a mutually convenient time to meet, you can record the fitting session by taking photos or videos.
I’ve done it a hundred times, and it’s 100% possible!
If you’re interested in becoming a remote freelance technical designer. I cover this in more detail in my article Freelance Technical Designer: How Do You Work Remote?
Tips on Calling out Garment Fit Issues in Your Tech Pack
- Be clear and concise: Clearly specify the problem areas and fit issues in your tech pack. For instance, if you find the gathers on the skirt is not enough, write a comment like “add 50% more gathers on skirt” And don’t forget to tweak the measurement specs.

- Include photos: In addition to clear comments, make sure to add photos of any areas of concern. This helps the team and your sample makers visualize the fitting issues.
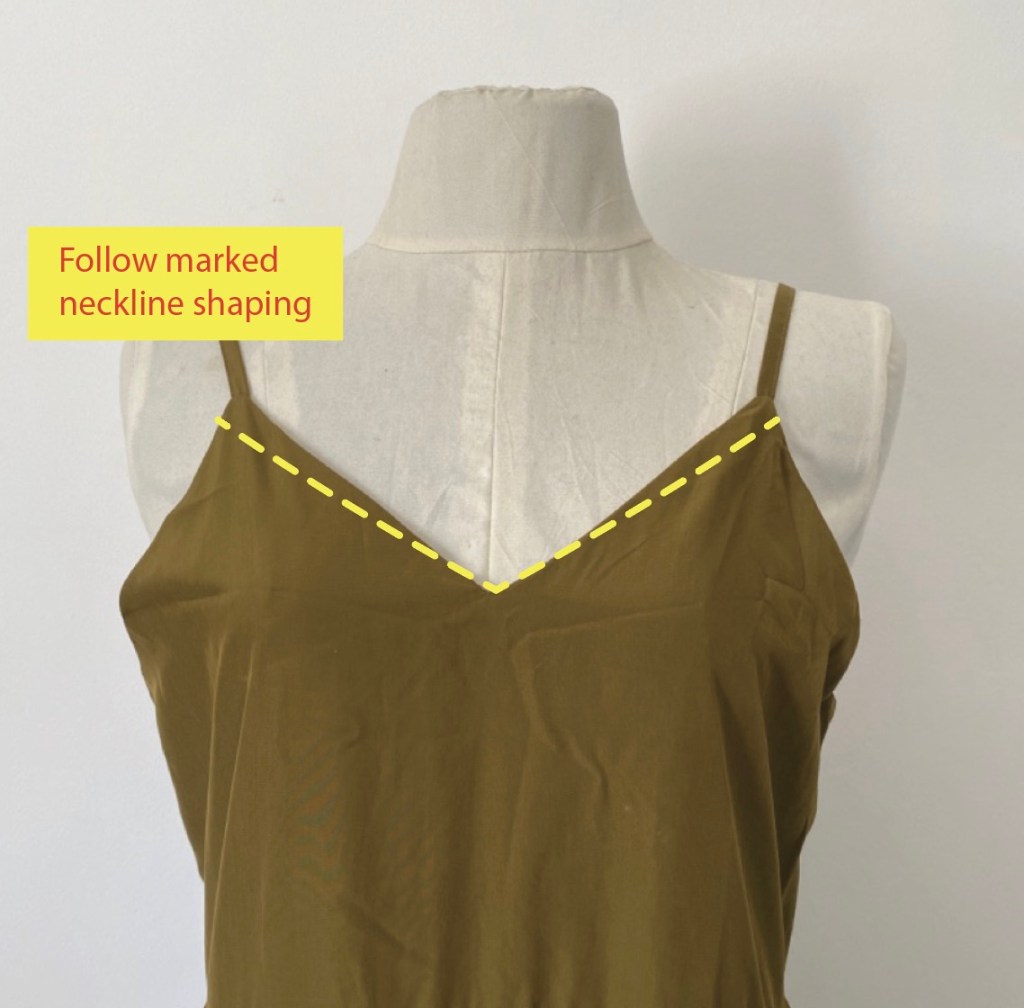
- Mock-up fitting revisions: Whenever possible, it’s best to mock up any fitting revisions. You can use pins to simulate adjustments like darts or length changes. In some cases, you can send back the fit samples with the pinned adjustments so the sample makers can easily follow along and create the desired fit.

- Document revisions: Always document revisions on your tech packs to serve as a reference for future samples. This way, confirming whether requested changes are executed is super easy.